Setup a DevOps pipeline using popular tools like Jenkins, GitHub
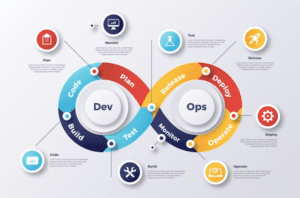
Continuous Integration and Continuous Delivery, or CI/CD for short, is a comprehensive DevOps method that focuses on the creation of a mix that is compatible with the process of software development and the process of software operation. Improving ROI may be accomplished via the use of automated updates and the automation of procedures. Developing a CI/CD pipeline is the linchpin of the DevOps paradigm. This implementation makes the process of bringing a product to market far more efficient than it was previously possible.
How to Use GitHub Actions to Construct a CI/CD Pipeline
Before we dive in, here are a few quick notes:
It is important to clearly understand what a CI/CD pipeline is and what it should perform. This is only a quick remark, but it’s essential. When your code is modified, a continuous integration pipeline will run to ensure that all of your changes are compatible with the rest of the code before it is merged. In addition to this, it should build your code, perform tests, and validate that it works properly. The produced code is then sent into production via a CD pipeline, which takes the process one step further.
GitHub Actions take a choose-your-own-adventure-style approach to continuous integration and continuous delivery. You will be presented with this message when you launch GitHub Actions for the first time in a repository. You have access to a plethora of guided alternatives that come with pre-built CI processes that you may exploit following the specifications of your technology. On the other hand, if you want to, you may construct your CI process from the ground up.
Key advantages of using GitHub Actions for CI/CD pipelines

But before we get into that, let’s take a moment to review a few of the advantages of using GitHub Actions; after all, quite a few different solutions are now available. Permit me to break out the following four major advantages that I’ve found:
CI/CD pipeline setup is simple:
Because developers built GitHub Actions specifically for developers, you won’t need specialized resources to establish and manage your pipeline. There is no need to set up CI/CD since it is unnecessary manually. You won’t need to install webhooks, acquire hardware, reserve certain instances elsewhere, keep them updated, apply security updates, or spool down idle machines. You need to add one file to your repository for it to be functional.
Respond to any webhook on GitHub:
You can use any webhook as an event trigger for an automation or CI/CD pipeline since GitHub Actions is completely linked. This covers things like pull requests, bugs, and comments. Still, it also includes webhooks from any application that you have linked to your GitHub repository. Let’s imagine you’ve decided to run a portion of your development pipeline using any of the numerous tools now available on the market. With GitHub Actions, you can initiate CI/CD processes and pipelines of webhooks from these applications (even something as basic as a chat app message, provided, of course, that you have connected your chat app to your GitHub repository).
Community-powered, reusable workflows:
You can make your workflows public and accessible to the larger GitHub community, or you may browse the GitHub Marketplace for pre-built CI/CD workflows (there are more than 11,000 actions available!). Did I mention that every action is reusable? All you have to do is reference its name. That is correct as well.
Support for any platform, language, and cloud:
Actions on GitHub are compatible with any platform, language, or cloud environment without restriction. That indicates that you can utilize it with any technology you choose.
Steps to setup DevOps Pipeline
In this article, we’ll walk through the steps to set up a DevOps pipeline using popular tools like Jenkins and GitHub.
Step 1: Set up a version control system
Installing and configuring a version control system (VCS) to store and administer the application’s source code is the first stage in establishing a DevOps pipeline. GitHub is one of the most widely used version control systems (VCS) solutions. It allows users to save and share code in a repository that is hosted in the cloud. Create an account on GitHub and follow the on-screen directions to set up a new repository. This may be done by clicking here.
Step 2: Set up a build tool
Next, you must configure a build tool to compile, test, and package your code automatically. This will take you to the next phase. Jenkins is an open-source automation server with hundreds of plugins to automate different phases of the software development lifecycle. It is one of the most common build tools and one of the most used tools overall. Download Jenkins, then install it on a server or cloud instance. Once that’s done, follow the on-screen directions to configure it after setting it up.
Step 3: Configure your pipeline
After installing and configuring your build tool and version control system, the following step is to set up and configure your pipeline. Your application’s construction, testing, and deployment may all be automated via a pipeline consisting of a sequence of phases. A Jenkinsfile is a text file that explains the steps of your pipeline. You may use Jenkins to establish a pipeline; the file you use to do so is called a Jenkins file. Your application’s construction, testing, packaging, and deployment may be stages. You can use plugins to automate the process.
Step 4: Add testing and quality checks
It is essential to include testing and quality checks into your pipeline if you want to guarantee the satisfactory performance of your application. Automating unit, integration, and end-to-end tests may be accomplished with a wide range of testing frameworks and tools. In addition, you may check for problems with the code’s quality and security by using tools that analyze static code. You may incorporate third-party tools into your pipeline or use one of the numerous plugins included with Jenkins for testing and quality checks.
Step 5: Deploy your application
Deploying your application to a production environment should be the last step in your DevOps pipeline. To automate the deployment process and guarantee consistency in various contexts, you may use applications such as Ansible, Docker, and Kubernetes. You may also track the performance of your application by using monitoring tools, which will allow you to spot any problems that may emerge.
Conclusion
In conclusion, establishing a DevOps pipeline via the use of well-known technologies such as Jenkins and GitHub may assist in the process of software development life cycle streamlining, hence enhancing both the rate at which software is delivered and its overall quality. You may improve the quality of your application’s development as well as the productivity of your development team by automating the processes of developing, testing, and deploying your application.